Guides
Sketch to Render: The Complete Guide (2026)
June 16, 2026
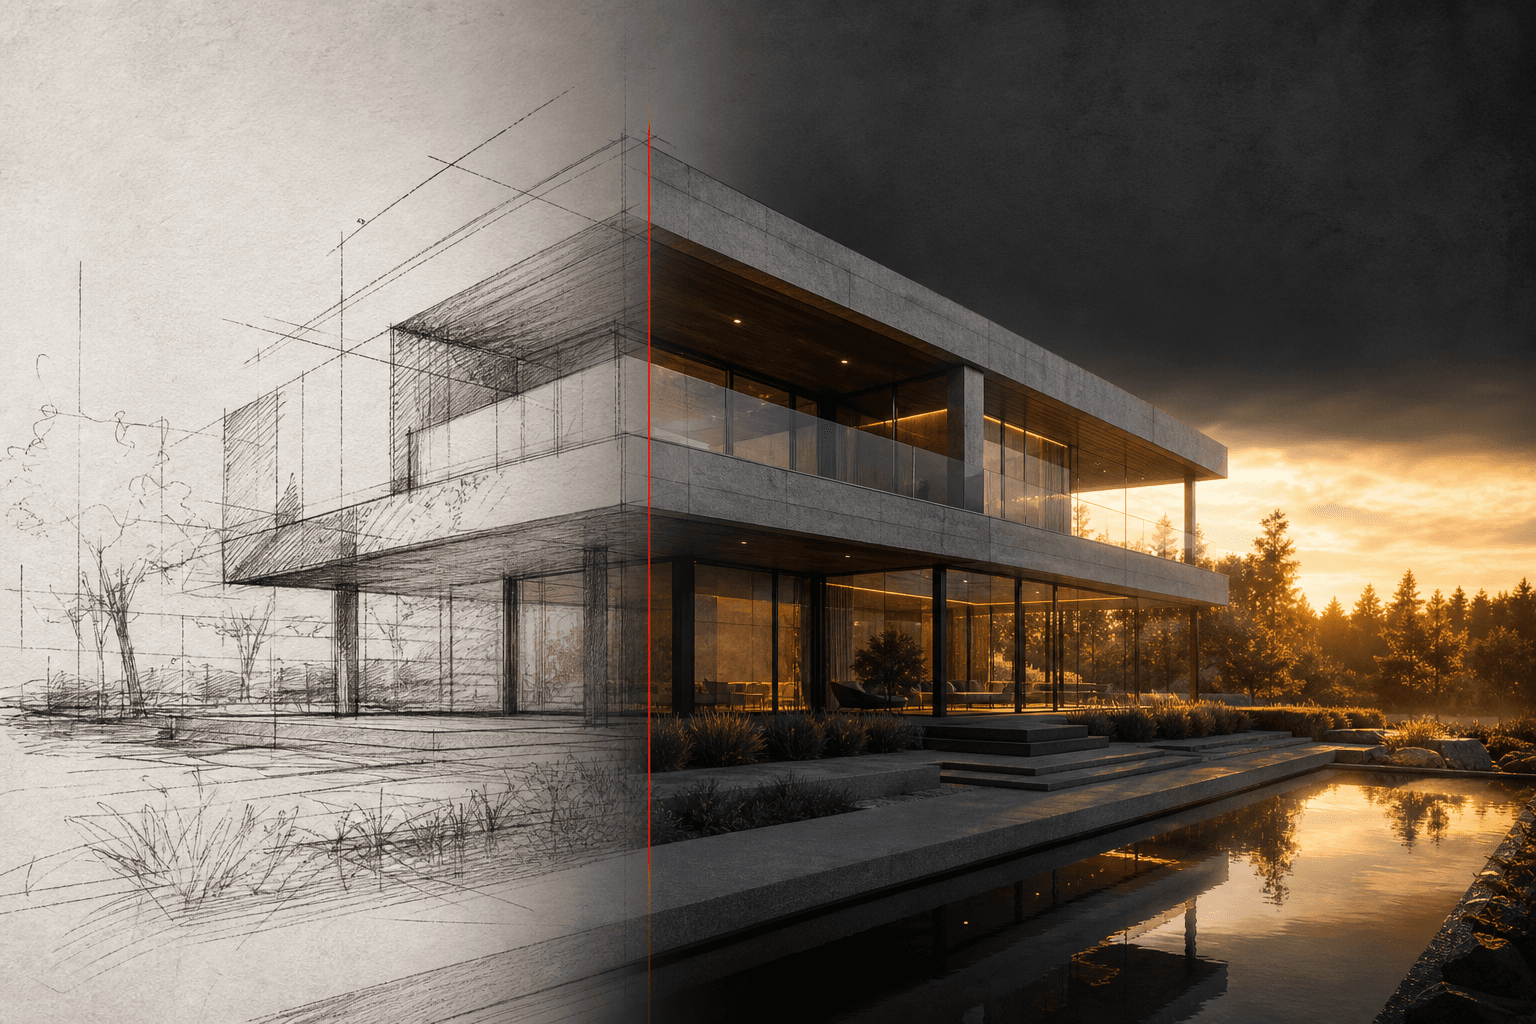
The sketch is still the fastest design tool ever invented. What changed is what happens next: instead of a week of modeling and rendering to make the idea presentable, sketch-to-render AI gets you from drawing to photorealistic image in seconds. Here's how to do it well.
What sketch-to-render AI actually does
The model reads the architecture in your linework — perspective, massing, openings, roofline — and generates a photorealistic image that keeps that structure while adding materials, lighting, landscape and people from your text prompt. The design stays yours; the rendering labor disappears.
Preparing the sketch
The input quality sets the ceiling. Three rules:
- Contrast wins. Dark lines on light paper. Photograph in even light, avoid shadows across the page, or scan if you can.
- Perspective beats plan. A 3D-ish view (even loose) gives the model spatial information to work with. Elevations also work well; floor plans are a different tool.
- Resolve the important edges. The model honors confident lines and improvises around vague ones. If the canopy profile matters, draw it like it matters.
Pencil, ink and marker all work. So do whiteboard photos and iPad sketches.
Prompting for architecture
A good render prompt has four parts:
- Building character: "two-storey timber-clad house", "concrete cultural pavilion"
- Materials: "charred larch, zinc roof, board-formed concrete base"
- Context: "pine forest clearing", "dense urban infill street"
- Light and mood: "low winter sun", "overcast Copenhagen light", "warm dusk"
A complete example: "Small lakeside sauna, charred timber cladding, large picture window, rocky shoreline, still water, golden evening light."
Don't over-prompt. Eight to twenty words usually beats a paragraph — the geometry is already in your drawing.
The iteration loop
The first render is a conversation starter, not a verdict. On a node canvas like RNDRS, wire the same sketch to multiple render nodes and vary one thing per node — material palette, season, time of day. Side-by-side options are how you (and your client) actually decide.
When a direction wins:
- Refine the prompt for the details that bother you.
- Extend the frame if the crop is tight for your layout.
- Upscale to 4K for boards and print.
- Optionally animate a slow push-in for the presentation.
Where it fits in real work
- Client meetings: sketch the idea live, render it before the meeting ends. Nothing builds confidence like seeing the photograph of a ten-minute-old idea.
- Competitions: explore ten directions photoreal in an afternoon, then spend your modeling time on the winner only.
- Early planning conversations: a photoreal image of a loose sketch communicates intent without over-promising resolved detail.
Common mistakes
- Rendering a dead sketch. If the drawing has no spatial logic, the AI invents one. Fix the sketch, not the prompt.
- Fighting the model on style. If you want ink-wash atmosphere, ask for it — "photoreal" is a choice, not the only output.
- Stopping at one render. Eleven seconds per iteration means the tenth option costs less than two minutes. Use that.
Try it on the last thing you sketched — 3 renders are free, and the first one usually settles whether this belongs in your workflow.